In this guide, we will teach you how to hide system partitions on Windows 10 so that you don’t face the problem.
Steps to Hide System Partitions in Windows 10?
Press Windows key + R to open the Run app and type in cmd. This will open the command prompt. Alternatively, you can also press Windows Key + X and select Command Prompt
Type in diskpart on the Command Prompt. This will open the Windows command line Disk Partition utility.
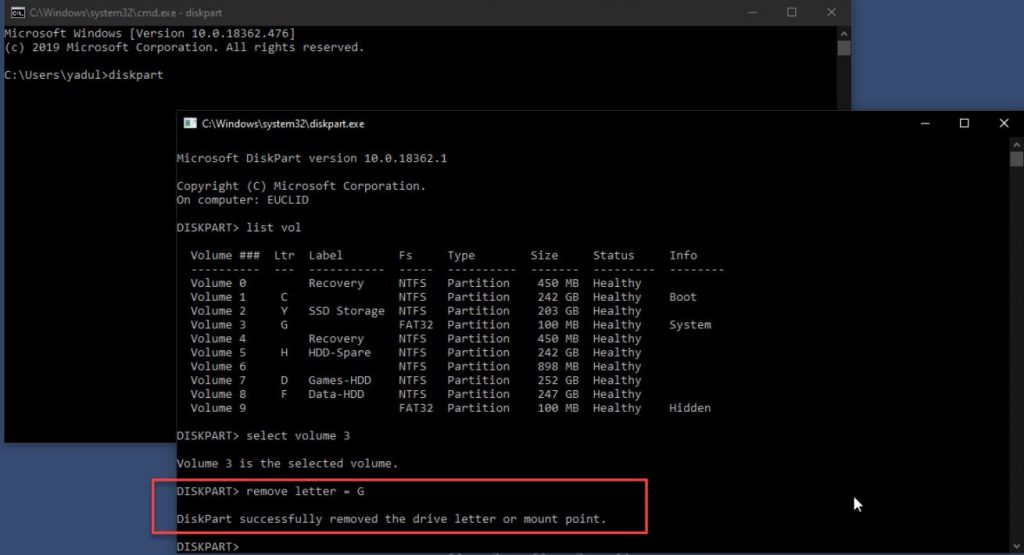
Type in list vol. This command will show you all the volumes, which means, all the partitions on all the drives that are connected to your system. Make a note of the volume number and letter of the partition you want to hide.
Select the partition you want to hide by typing select volume volume number. Then press Enter. In this case, I’m going to select volume 3, which is a system partition. Hence my command will be
After selecting the volume, type in remove letter = volume letter. In my case the command is
This will remove the partition letter. Since the partition has no letter assigned now, Windows won’t show it in the explorer.
Lastly, type in exit then press Enter, and you’re good to go.
Open Windows Explorer, and you’ll notice that the drive is gone. Since it has no drive letter, Windows Explorer doesn’t recognize it and doesn’t display it either. Read more:
Tips to Block Adult Content on Your Windows PC3+ Methods to Find Your Windows 10 Product Key InstantlyHow to Remove Write Protection from USB Drive on Windows 10